Step-by-Step Guide to the Animation Process | Learn How
Discover the essence of character design, storyboarding, animatics, and the magic that breathes life into your favorite animated tales.
Ever wondered how those classic animated films or the viral explainer videos you see everywhere get made? It's not magic, but it is a structured, creative journey broken down into three core stages: Pre-Production, Production, and Post-Production. Getting a handle on this workflow is the secret to turning a simple idea into a polished, professional masterpiece.
From Spark to Screen: The Animation Journey
Every animation, whether it's a quick 30-second social media clip or a full-length feature film, follows a similar path from concept to the final cut. This journey isn’t just a random list of tasks; it’s a carefully planned pipeline where each step logically builds on the one before it.
Think of it like building a house. You wouldn't just start hammering up walls without a solid blueprint, would you? The animation process works the exact same way, using a three-phase approach to keep everything efficient and high-quality.
The Three Foundational Stages
The entire process is neatly organized into three distinct but interconnected stages. Understanding how they flow into one another is what separates the pros from the amateurs.
- Pre-Production: This is the blueprint phase. It’s all about planning, where ideas get fleshed out, scripts are written, and the visual style is locked in. You’re essentially creating a detailed roadmap before any of the heavy lifting begins.
- Production: This is where the magic happens. The plans from pre-production are brought to life as animators create movement, modelers build assets, and every visual element is constructed frame by frame.
- Post-Production: The final polish. Raw animated scenes are edited together, sound design and music are added, colors are graded, and the project is rendered into its final, viewable format.
Understanding this structured process is your first step toward success. It reveals how early decisions in scripting and storyboarding directly impact the complexity and cost of the production stage—a crucial lesson for any aspiring animator or project manager.
This structured workflow is the engine behind a booming creative field. The animation industry has seen explosive growth and is projected to be worth an estimated $462 billion by the end of 2025. This surge isn't just from movies; it's fueled by animation’s use in advertising, education, and corporate communications, with some valuations expecting the market to reach nearly $895 billion by 2034.
Before diving deep into animation, it helps to understand the bigger picture of digital media. Exploring some general content creation principles for beginners can provide a great foundation. For a more detailed look at each stage, our guide to the animation process offers a deeper dive. This article will give you the bird's-eye view, equipping you with the knowledge to navigate your own animation journey from that first spark of an idea to the final screen.
Building Your World in Pre-Production
This is where your story really starts to come alive. Pre-production is the blueprint for your entire animation project. It’s all about planning, designing, and solving problems before the heavy lifting of animation begins. Nailing this stage saves you from costly mistakes and creative dead ends down the road. It’s how you take a great idea and turn it into a plan that actually works.
Think about it this way: a 30-second explainer video and a five-minute short film both start with the same basic questions. Who is the story about? What does their world look like? What’s the core message? Pre-production is where you find those answers, making sure the final product is cohesive, compelling, and finished on time.
From Words to a Visual Plan
Everything kicks off with the script. This isn't just dialogue. It's a detailed document that lays out the scene-by-scene action, character emotions, and the overall pacing. For a commercial, the script needs to be incredibly tight to get the message across in seconds. A narrative short has a bit more breathing room to develop characters and plot.
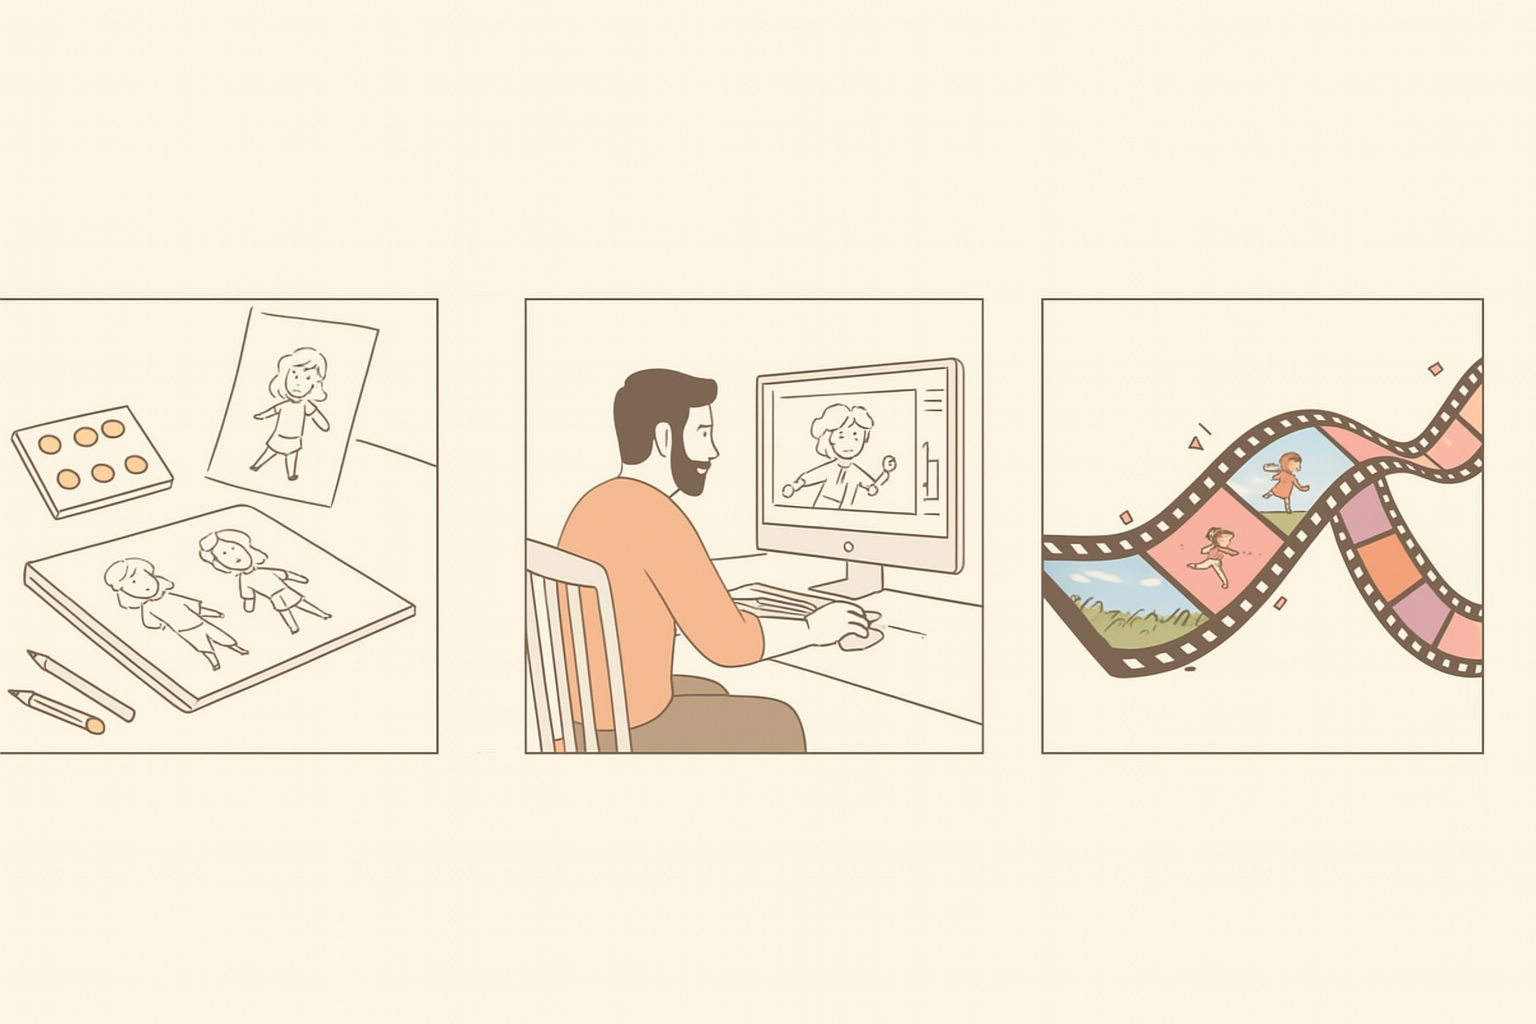
Once the script gets the green light, it’s time for storyboarding. This is the first time the written words become visual. Artists create a sequence of panels, almost like a comic book, that map out key shots, camera angles, and character movements. It’s the first real glimpse you get of your animation.
The image below shows the basic flow of storyboarding, from rough sketches to a full narrative sequence.
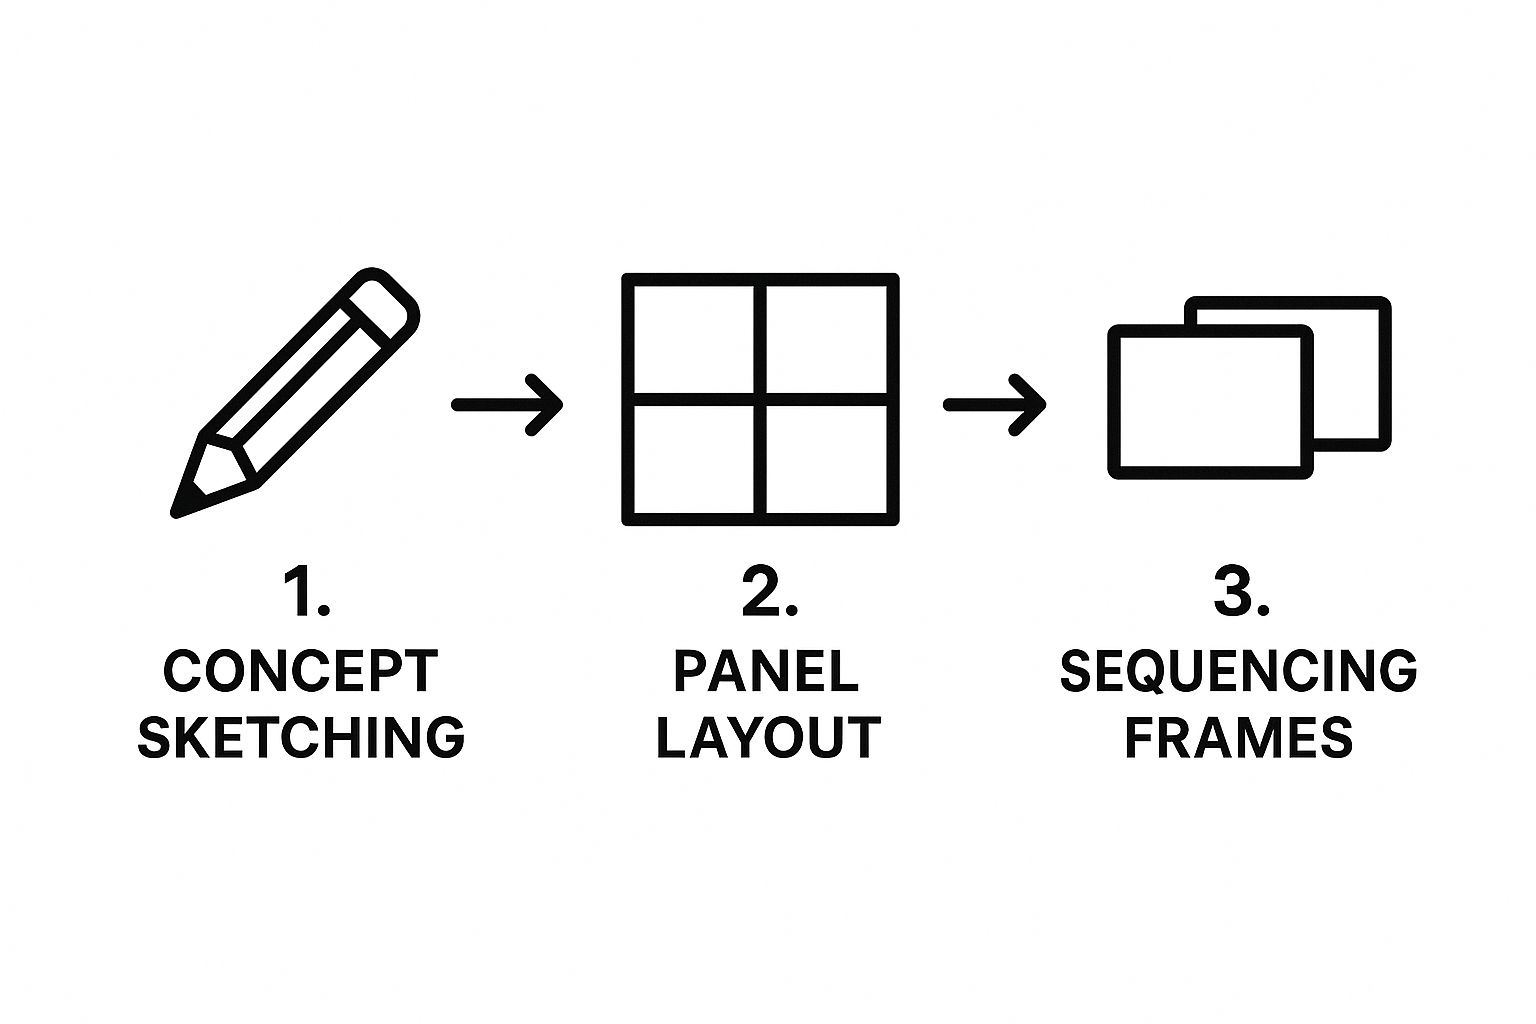
This visual roadmap makes it incredibly easy to spot any narrative gaps or pacing issues long before you’ve sunk hundreds of hours into the actual animation.
From the storyboard, we build the animatic—which is basically a moving storyboard. The panels are timed out and paired with scratch tracks for dialogue, simple sound effects, and placeholder music. The whole point is to test the timing and flow of the story.
An animatic is your first true test of the story's rhythm. Watching it, you might realize a joke doesn't land, an emotional moment feels rushed, or a scene is simply unnecessary. Fixing it now costs almost nothing compared to re-animating a finished sequence.
Designing the Look and Feel
While the story gets mapped out, designers are busy creating the visual world. This process has several key parts that all work together to give the project its unique identity.
- Character Design: This is way more than just a few sketches. Designers explore different shapes, expressions, and clothing to bake personality right into each character. A hero might have strong, angular lines, while their friendly sidekick could be made of soft, round shapes.
- Style Frames: These are high-quality, fully rendered stills of key moments from the animation. They define the final look, showing exactly how the lighting, textures, and composition will come together on screen.
- Color Script: Color is a huge part of storytelling. A color script is a series of small images or color swatches that map out the animation's emotional journey. For example, a scene might start with warm, optimistic yellows and gradually shift to cold, somber blues to show a change in mood.
This design stage is crucial for building a world that feels consistent and believable. For a marketing campaign, these elements ensure brand colors and identity are spot-on. When making a 2D explainer video, for instance, the style frames and color script guarantee the final product fits the client’s brand guidelines perfectly.
Ultimately, pre-production is the most important part of the entire animation process. It's the disciplined, creative foundation that makes everything in production and post-production possible. If you skimp on these steps, you're setting yourself up for budget overruns, missed deadlines, and a final product that just doesn't connect with your audience.
Bringing Your Vision to Life in Production
With a solid blueprint from pre-production, it's time to roll up your sleeves for the most hands-on part of the journey. The production stage is where all those detailed plans, sketches, and storyboards finally become tangible, moving art. Think of it as the factory floor of animation—this is where the real magic happens.
At its core, production is all about building every single visual element the audience will see. This means creating the final character models, painting detailed backgrounds, and constructing any props or environments your story calls for. Once those assets are ready, the real motion work begins.
The Art and Science of Motion
Animating is what most people picture when they think of this entire process. It’s where artists give movement to characters and objects, a delicate dance between artistic intuition and technical precision. The specific techniques can vary dramatically depending on whether your project is 2D or 3D.
One of the most fundamental techniques is keyframing. Animators set "key" poses at crucial points on a timeline to define the beginning and end of a specific movement. The software then fills in the "in-between" frames to create a smooth, fluid motion. This method gives artists meticulous control, making it perfect for nailing those stylized character actions. As you dive deeper, you'll want to explore the nuances of keyframe animation to really sharpen your skills.
For projects aiming for that uncanny, hyper-realistic feel, animators might turn to motion capture (mocap). This process involves recording the movements of real actors and applying that data directly to a 3D model. It’s an incredibly powerful way to capture subtle, natural human gestures that are notoriously difficult to animate by hand.
Pro Tip: In any professional studio, animators live by "dailies" or "sweatbox" sessions. These are daily review meetings where the team watches the previous day's work, offers feedback, and catches any inconsistencies early on. This collaborative loop is absolutely essential for maintaining quality and keeping everyone aligned.
Differentiating 2D and 3D Workflows
While both 2D and 3D animation share the same end goal—creating motion—their production pipelines diverge quite a bit once asset creation kicks off. Understanding these differences is key to knowing why one might be a better fit for a project, especially when creating things like detailed 3D explainer videos for complex products.
To help visualize these different paths, here’s a look at how the production stage compares for 2D and 3D animation.
2D vs 3D Production Workflows
| Production Stage | 2D Animation Approach | 3D Animation Approach |
|---|---|---|
| Asset Creation | Artists draw and paint characters and backgrounds as flat images. | Modelers build characters, props, and environments as 3D geometric meshes. |
| Movement | Animators draw frame-by-frame (in-betweening) or manipulate 2D rigs. | Animators manipulate a character's digital "skeleton" (rigging) to create poses. |
| Detailing | Focuses on line work, coloring, and shading within the 2D drawings. | Involves texturing (applying surface details), shading, and complex lighting. |
As you can see, the required skills and day-to-day tasks look very different depending on the dimension you're working in.
The Technical Magic Behind the Scenes
In 2D animation, one of the most crucial jobs is in-betweening, or "tweening." After a senior animator sets the key poses, junior animators or specialized software will create all the transitional frames. This is what makes a character’s wave look fluid instead of like a series of jerky stills.
The 3D world, on the other hand, has its own set of highly specialized roles. Before a 3D model can even think about moving, it has to be rigged. A rigger builds a digital skeleton inside the model, complete with joints and controls that an animator will later use to pose and move it. A great rig is the difference between a character that moves naturally and one that feels like a stiff, lifeless doll.
After rigging, 3D artists get to work on texturing and shading. This is where surfaces truly come to life. A character’s skin gets its pores and imperfections, a metal robot gets its reflective sheen, and a wooden table gets its unique grain.
At the same time, lighting artists step in to act as virtual cinematographers. They place digital lights within the scene to craft the mood, guide the viewer's eye, and make sure every shot is visually compelling. The lighting for a dark, moody scene will be worlds apart from a bright, cheerful one, making this step absolutely critical for establishing the story's tone.
The Final Polish in Post-Production
You’ve animated all your scenes, and things are looking great. But don't pop the champagne just yet—the story isn't quite finished. Post-production is that final, crucial phase where all the separate ingredients come together to create a seamless, professional-looking piece. This is where a good animation becomes a great one.
This last leg of the journey is where the real magic happens. We’ll be layering visual elements, setting the mood with color, and building an immersive soundscape. These are the final touches that make all the difference between raw footage and a truly captivating experience.
Assembling the Pieces with Compositing
First up is compositing. Think of a compositor as a digital magician whose job is to solve a complex puzzle. They take all the separately rendered layers—characters, backgrounds, special effects—and weave them into a single, cohesive shot.
Imagine a scene where your character is caught in a digital downpour. The character animation, the rain effect, the background painting, and even the way light reflects off wet surfaces would all exist as separate files. A compositor layers these elements, making sure the rain falls both in front of and behind the character, splashes convincingly, and that the lighting on the character feels perfectly natural to the scene.
It's so much more than just stacking images. This step involves sophisticated tricks to manage transparencies, blend edges, and iron out any little inconsistencies between the layers. Without a skilled compositor, even the most beautifully animated scenes can feel disjointed and fake.
Compositing is where the illusion becomes reality. It’s the art of making the audience believe that dozens of separately created elements were always meant to be in the same shot, at the same time, under the same virtual camera.
Crafting the Mood with Color Grading
With the scenes assembled, it's time for color grading. This is where you lock in the emotional tone and overall mood of your animation. Color grading involves adjusting and enhancing the color to ensure every shot feels consistent and evokes a specific feeling from the viewer.
For a happy, sun-drenched scene, a colorist might dial up the warm, saturated tones to amplify the feeling of joy. On the other hand, a tense, suspenseful moment could get a wash of cool blues and deep, crushed shadows to create a sense of unease.
Here’s how color grading is a powerful storytelling tool:
- Continuity: It guarantees that a character's red coat remains the exact same shade of red in every shot, even if the lighting was different during production.
- Atmosphere: It sets the vibe. A gritty, desaturated palette can make a world feel bleak and oppressive, while vibrant colors can bring a sense of life and magic.
- Focus: Color can be a spotlight, subtly guiding the viewer's eye to an important character or object in an otherwise busy frame.
Great color grading ensures your animation’s visual language is consistent and powerfully reinforces the story you’re telling.
Building an Immersive World with Sound
Once the visuals are locked, we shift focus to what the audience hears. Sound design is arguably one of the most powerful and often underrated tools for pulling your audience into the world you've created. It’s everything from the crystal-clear dialogue to the almost unnoticeable rustle of a character's clothing.
The sound design process involves mixing several key layers:
- Dialogue and Voiceover: The number one priority is making sure every spoken word is crisp, clear, and mixed at the right volume.
- Foley: These are custom-recorded sounds that sync up with on-screen actions—think footsteps on gravel, a key turning in a lock, or the clink of a glass. Foley makes the world feel tangible and real.
- Sound Effects (SFX): This layer covers everything else, from ambient background noise like distant city traffic to big, impactful sounds like explosions or magical whooshes.
- Musical Score: Finally, the score is laid in to crank up the emotion. A soaring orchestral piece can make a victory feel epic, while a quiet piano melody can deepen a moment of sadness.
All these layers are carefully balanced and mixed together, creating a rich soundscape that doesn't just support the visuals—it elevates them.
The Final Step: Rendering and Exporting
The very last thing you’ll do is rendering and exporting. This is the technical step where your entire project file—with all its visual layers, effects, and audio—gets converted into a final, playable video file.
The key here is to choose the right settings for where your animation will be seen. The export specs for a TV commercial are worlds apart from what you'd need for an Instagram Reel.
Here are a few common destinations and what they usually require:
- YouTube/Vimeo: You’ll likely want an H.264 codec in an MP4 file. This gives you a great balance between quality and file size for smooth streaming.
- Social Media (Instagram, TikTok): These platforms often demand a vertical aspect ratio (9:16) and smaller file sizes for quick loading on mobile devices.
- Film Festivals: They might ask for a high-bitrate file like a ProRes or DNxHD MOV to ensure maximum quality when projected on a massive screen.
Picking the wrong format can lead to grainy video, playback issues, or files that are way too big. After all this work, taking a few extra minutes to export correctly ensures your animation looks its absolute best, no matter where it’s being watched.
Choosing Your Animation Toolkit
Having the right tools is what turns a creative vision into a tangible, moving piece of art. When you're building your animation toolkit, it’s not about grabbing the most popular or expensive software off the shelf. It’s about being strategic and picking the applications that genuinely fit your project, budget, and personal workflow.
Think of your toolkit as a whole ecosystem, not just a single program. It’s a collection of software that will carry you from the first sketch to the final render. A freelancer just starting out might lean on powerful free software, while a small studio will likely invest in industry-standard packages to keep collaboration smooth and attract top-tier talent. Let's break down the kinds of tools you'll need for each stage of the game.
Tools for Pre-Production and Planning
Before you even think about animating a single frame, you have to lock down your story. The tools for this phase are all about organization and visualization. Storyboarding is a non-negotiable step, and while any drawing app can get the job done, specialized software like Storyboard Pro is built for it, with features for panel creation, camera moves, and timing out your animatic.
If you’re on a tighter budget or working on a simpler project, don't sweat it. An app like Procreate on an iPad or even basic presentation software can work wonders. The main goal here is to create a crystal-clear visual blueprint that the entire team can follow. This is also where project management tools like Trello, Asana, or Monday.com become your best friends, helping you track tasks, deadlines, and artist assignments to keep everything on schedule.
Production Software The Core of Your Workflow
This is where the real magic happens, and your choice of animation software is a major decision. The market is full of options, from massive, do-it-all suites to more focused, specialized tools for both 2D and 3D pipelines.
For 3D Animation:
- Autodesk Maya & 3ds Max: For years, these have been the gold standard in the film and gaming industries. They're incredibly powerful, but be prepared for a steep learning curve and a subscription fee.
- Blender: This free, open-source software has absolutely exploded in popularity and capability. It’s a complete 3D powerhouse, handling everything from modeling and sculpting to rigging, animation, and rendering.
- Cinema 4D: A favorite among motion graphics artists, known for its user-friendly interface and slick integration with post-production software.
For 2D Animation:
- Toon Boom Harmony: This is the go-to for television series and feature films. It offers incredibly advanced tools for both classic frame-by-frame and modern rigged 2D animation.
- Adobe Animate: A versatile tool that shines for web animations, interactive content, and character work. It plays very nicely with the rest of the Adobe Creative Cloud.
- Adobe After Effects: While it’s primarily for post-production, its robust motion graphics and puppet-pin animation features have made it a staple for explainer videos and certain styles of character animation.
Your software choice is a big commitment. Think about your long-term goals before you dive in. If you dream of working at a major studio, learning Maya or Harmony is a smart move. If you're carving your own path as an independent creator, Blender gives you unbelievable power without the price tag.
Post-Production and Collaboration Tools
Once your scenes are animated, it's time to assemble them, add the final polish, and get them ready for the world. Adobe After Effects is the undisputed king of compositing and visual effects, while Premiere Pro or DaVinci Resolve handle the final edit, color grading, and sound mixing.
Rendering is another huge piece of the puzzle, especially in 3D. A single, complex frame can take hours to render on a standard computer. This is where cloud rendering farms like RebusFarm or Fox Renderfarm are lifesavers. You can upload your project and tap into their massive server power to get your scenes rendered in a fraction of the time.
To really get the most out of your production phase, understanding things like Unreal Engine 5 performance best practices can make a world of difference in your workflow. And if building your own toolkit and pipeline sounds like too much overhead, you can always explore full-service video animation services to get access to an expert team and their established workflow.
Common Questions About the Animation Process
Whether you’re a client commissioning a video for the first time or an animator just starting out, the world of animation comes with a handful of recurring questions. Let’s cut through the noise and tackle some of the most common queries with straightforward, experience-based answers.
How Long Does a One-Minute Animation Take?
This is the classic "how long is a piece of string?" question. The honest answer is: it depends entirely on the project's complexity. There's just no single timeline that fits all.
A simple 2D motion graphics video might take a few weeks from start to finish. On the other hand, a detailed 3D character animation with complex scenes could easily stretch to three months or more.
Several key variables will dramatically impact the timeline:
- Animation Style: Traditional 2D is generally quicker than creating and rigging complex 3D models from scratch.
- Level of Detail: An explainer video using simple icons is worlds apart from one with lush, hand-painted backgrounds and intricate character movements.
- Number of Characters: More characters mean more time spent on design, rigging, and, of course, animation.
This variability is exactly why a detailed pre-production phase is so essential. It gets everyone on the same page and helps establish a realistic timeline from the get-go.
Which Animation Stage Is Most Important?
Ask any industry veteran, and you'll likely get the same answer: pre-production is the most critical stage. While every phase is vital, a solid foundation is everything.
Building your project on a locked-down script, well-defined storyboards, and finalized designs prevents incredibly costly and time-consuming fixes down the line. When you get the story and visuals right on paper before the labor-intensive production kicks off, you ensure the entire team is working towards the same, clear goal.
It’s always cheaper and faster to redraw a storyboard panel than it is to re-animate an entire scene. Investing time upfront in planning saves an exponential amount of time and budget down the line.
Can You Learn Animation Without Art School?
Absolutely. While a formal art school education provides structure, deadlines, and valuable networking opportunities, it is by no means the only way to become a professional animator.
The internet has democratized learning, offering a treasure trove of high-quality resources for self-starters. Many of today's most successful animators are self-taught, having honed their skills through sheer dedication and consistent practice.
For those looking to build a career, remember that the business side is just as crucial as the artistic one. We've put together some valuable insights on how to thrive as an independent artist in our guide for the modern freelance animator.
What Is an Animatic?
Think of an animatic as a moving storyboard. It’s a rough draft of your animation, created by taking the storyboard panels and timing them out with basic audio. This usually includes scratch dialogue, placeholder sound effects, and a rough music track.
Its main purpose is to check the pacing and narrative flow before you commit to the expensive and time-consuming process of full-blown animation. It’s like an architect’s blueprint; it’s not the finished building, but it shows you if the structure is sound and all the rooms are in the right place before you start laying bricks.
At Moonb, we simplify this entire process. Our on-demand creative infrastructure gives you access to a full team of animators, designers, and strategists through a simple, fixed-fee subscription. Remove the guesswork and get consistent, high-quality animated content by booking a demo with Moonb today at https://moonb.io.
Frequently asked questions
Script and concept, then style frames and character design, then storyboard, then animatic, then animation production, then sound design and final polish. Each stage locks decisions so the next one moves faster and the final cut stays on brief.
An animatic is a rough timed version of the storyboard with scratch audio. It is the cheapest place to fix pacing, story, and timing problems before they become expensive animation revisions, and it aligns everyone on the final shape of the piece.
Most of the high-leverage feedback happens early: script, style frames, storyboard, animatic. Once full animation begins, changes are still possible but more expensive. A good process front-loads decisions so revisions later are polish, not rebuilds.

